Yamaha Wolverine Forum banner

Yamaha Wolverine X4 9000 miles and 600 hours

40K views 30 replies 10 participants last post by  Bloodyrun  
#1 ·
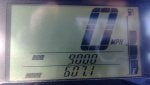
I'm going to do a full review/writeup but couldn't hold back any longer as I reached this milestone a week ago.

 
#3 · (Edited)
Small teaser pic of what's to come. Mobil 1 0W40 EU/European Car formula synthetic with Engine Butter (by Tinkseal which I've been using since 3K miles)

Image


More pics of cylinders 1 and 2 as seen from underneath using my endoscope that I was able to snake in through the wet clutch cavity

Image


Image


Image


Image
 
#4 · (Edited)
Wet clutch breakdown

So this happened just prior to 9000 miles. Some of the wet clutch housing bolts came loose. To refresh your memory, I had checked the condition of my wet clutch at 3K miles and buttoned her back up. I had noticed that the bolts came out pretty easily and so when I reinstalled them I installed them with the same torque I felt they were initially tightened down with. It could be that when I checked them at 3K miles they had loosened over time. Needless to say, when it goes back together I'm going with my gut and tightening them down how I normally would. My only guess as to what could have contributed to it is running OEM 22 gram weights, which only last about 2K miles before they get worn down fairly quick as Hunterworks doesn't make 22 gram HV weights (other than experimental ones I've used) as they're difficult to make and wouldn't be very popular. The roller weight difference could have caused vibration over time. I can tell you after I temporarily put 18 gram HV weights my CVT seemed to run smoother at high speed. I'm going to put 20 gram HV weights in and deal with the slightly higher RPMs.

Oil had seeped out and got onto my belt so I figured I may as well do a more thorough wet clutch inspection/tear down since I had to tear the whole CVT apart to clean everything up anyways. FYI, this is the only time my X4 has left me 'stranded'........happened not to far from home so I was able to limp her home but obviously couldn't drive her like that for long.

Image


Initial wet clutch tear down (I meant to say: 'The wet clutch shoes will outlast the rubber inserts')


Deep thoughts by MassiveOverkill (at the end I meant to say the wet clutch shoes will outlast the rubber inserts, not the other way around).


I should have added: Higher RPM wet clutch engagement can be done by stronger springs, but stronger springs lessen clamping force so they're fighting each other. By using rubber grommets, you can delay wet shoe engagement without the negative effects that using stronger springs has.

Image


Image


Holding wet clutch in place with a piece of metal jammed in there (bolt is reverse-threaded and reusable)

Image


Wet clutch retaining bolt broken loose

Image


Wet clutch removed, you can see that hole in the upper right which leads to the crankcase, which is how I got pictures of the cylinder walls

Image


Clamping wet clutch to remove Circlips

Image


I will never let a gasket keep me down for days again. Permatex non-hardening blue is going on every metal-to-metal piece I work on from now on that requires a gasket

Image


Image


Rubbers squashed

Image


After reconditioning

Image


******* Filipino Engineering rubber reconditioning tool

Image


Rubber clamped in and heat applied

Image


I wasted 2 days trying to find a source for new rubbers or a suitable substitute without success so I decided to try and recondition/reform the wet clutch shoe rubbers. In the end, I ended up placing each rubber on a piece of wood, blasted it with my heat gun on high for 30 seconds, and then used my Filipino ******* tool to press on it. This worked best as I was able to smoosh the rubber towards the flattened side of the rubber making it round again. I then flipped the rubber over and repeated the process. In addition, the heat removed the hard plastic-like feel and restored its original rubber-like feel.

I think I can get another 4K miles out of this wet clutch before I'll need to replace it, that's one year's worth of more fun if I don't sell and upgrade to the new model coming out.

Final thoughts: Synthetic oil will prematurely wear your wet clutch out!!! I think I've debunked this myth at least on the X2/X4. I almost forgot to add: I believe the Hunterwork's machined sheave gets some credit for the longevity of my wet clutch. The greater mechanical advantage it allows at low speeds means when your wet clutch engages, it's not having to do so under as much stress which leads to less slipping.
 
#9 ·
I wasted 2 days trying to find a source for new rubbers or a suitable substitute without success so I decided to try and recondition/reform the wet clutch shoe rubbers.
What if you replaced the rubber with a nylon part. I've seen a lot of nylon tubing that may fit, just cut to length. Still have a little cushion but no grip...
 
#5 ·
Thank you for the time and energy you put in to all your informational posts Massive!

Question number 1, I assume the gen1 wet clutch has these same rubber grommets? I slugged my clutch at 1500 miles but didn’t disassemble to that point! If it is exactly the same that is something I will check if and when I’m in there again!

I’ve known of this mystery engine butter you’ve been testing for a while now, and I know it will be debated as to weather it actually does anything or not but obviously it isn’t hurting anything and I look at it as extra insurance since I’ve tested Tinkseal products pretty good myself and think they have value. So question 2, is it on the market? I’ve checked the HW site as well as the Tinken site and I don’t see anything!
 
  • Like
Reactions: MassiveOverkill
#6 ·
Thanks Budro, Gen 1 does not have the rubber grommets, it's new to the X2/X4 wet clutch. Trying to get an answer for ya on Engine Butter.
 
#7 ·
Ok, I had a feeling, in that they designed it so it couldn’t be slugged. If your correct in the explanation of them acting as a delay then slugging would be counter productive I guess!
 
#10 ·
Although I'm probably past the point on getting a decent return if I sell my X4, I'm hoping I can use this documentation to show: this isn't your average high-mileage rental. If I can't sell it for a decent amount, enough to put towards the June/July model (who knows if it's something I can even use), I'll run the wet clutch for about another year and just replace it. I'm not worried about the bottom end. If I need to freshen up the top end, that shouldn't be too difficult but stay tuned. I plan on pulling the spark plugs and see what the endoscope will reveal as far as valve condition.

What if you replaced the rubber with a nylon part. I've seen a lot of nylon tubing that may fit, just cut to length. Still have a little cushion but no grip...
I thought about that but Nylon would probably break down in oil quicker than rubber (I'm sure this stuff is Viton or some more-durable rubber compound) and it's too hard. I thought about silicon tubing. I have these saved and were going to use them before I decided to recondition the current ones:

https://www.amazon.com/dp/B07MBK9TX...B07MBK9TXV/?coliid=I2JG2YX0OZ5ORC&colid=1L3QB9E6QN49O&ref_=lv_ov_lig_dp_it&th=1
 
#11 · (Edited)
Secondary sheave service

Apologies for being slightly off-camera in some of the videos.

Removing the secondary spring, you're not going to be able to use the tire method here unless you weigh 350 lbs and the nut is larger as well. Hunterworks has resumed making the secondary spring holding tool.

Yamaha X2/X4 Spring Compressor

I could have loosened the nut a little more but for video purposes, only wanted to barely break it loose. Had I loosened it half to a full turn I probably wouldn't have had to fiddle with it so much. Choose which method you feel more comfortable with. With spring retaining nut requires ~66 ft-lbs, which I know I can obtain a lot easier with a wrench than with a chisel (with my highly-calibrated arm).


Removing the spring cup, something I would have on hand as a spare as they wear out fast. In the video I say 'rotate 90 degrees', where I should have said '45 degrees'.


UPDATE: more in-depth secondary tips as seen on the RMAX secondary:


Secondary sheave Deep Thoughts by MassiveOverkill


UPDATE: added pics of damage

Spring cup badly gouged from pins

Image


Bearing surface in bad shape and pin hole severely wallowed out. It should be round not oblong

Image


Pin should sit flush and straight as shown

Image


Once wear starts, the pin will cant and it just gets progressively worse:

Image


Something for lurking Yamaha Engineers. You reuse some parts from the Gen 1 clutching, which I get. I think the holes and pins need to be made larger to accommodate the added pressures in the X2/X4 clutching. Actually rectangular sliders would probably handle the side loading better and wouldn't gouge the spring cup as badly as the load would be distributed over a greater area.

New sheave surface would be straight, you can see how worn it is

Image


Image


Actually, I would inspect your secondary sheave every 2K miles, not every 4500.

Pictures of secondary sheave halves vs stock (9000 mile on left, stock on right). You can see the valley worn into the center of the secondary on the left as well as the wear marks of each. Physical proof of the Hunterworks machined sheave giving you higher highs. There's only a little more room for travel but if the Primary were cut any further, you'd get scalping of your roller weights from the camp plate.

Image


Image


Essentially new secondary spring vs my cycle-worn spring. Both are orange OEM. I decided to stay with the newer spring.

Image


Greasing your secondary:


Putting everything back together:


In a nutshell, those of you approaching 2000 miles (ignore my 4500 mile video comment) and/or working on your primary should take the time to inspect/service your secondary sheave as things wear faster on the X2/X4 secondary than they do on the Gen 1.

I'm updating this post with the parts I recommend getting prior to servicing the secondary sheave:

2 each of these grease seals https://www.partzilla.com/product/yamaha/93101-48004-00
2 each of these O ring seals https://www.partzilla.com/product/yamaha/93210-50768-00

1 secondary spring cup:

UPDATE: There's a new part number for the secondary spring cup. Hopefully the part has been beefed up. The new part number is B4J-17684-00-00, the old part number has BG4 for the first 3 digits. Not all parts warehouses are showing this update yet (Partzilla being one of them)


While you're at it, it wouldn't be a bad idea to have the wet clutch shaft oil seal handy, even as a spare

https://www.partzilla.com/product/yamaha/93102-45009-00
 
#12 · (Edited)
Thermotec insulation and driver side foot well repair

The Wolverine X2/X4 is one of the coolest running SxS as far as cabin heat. If you think your unit runs cool now, do these mods and you'll be amazed at the difference as you can improve on the existing design. No more uncomfortable heat by your right leg and sound is greatly reduced as well.

I had initially installed Thermotec in the center console, engine cover, and rear foot wells with good results. I also insulated my driver side coolant line the entire length of the cab. This is a MUST DO mod for every X2/X4 owner as the hot coolant line runs right along your right foot/leg. I didn't do the front foot wells initially because they're someone a PITA to remove. Pics from my initial mod:

Image


Hot coolant line wrapped with insulation

Image


I replaced the thinner blue insulation with a really fat pool noodle for maximum insulation. It goes over the metal portion of the coolant line. An added benefit of insulating the hot line is that heat transfer to your engine air intake and CVT air cooling ducts are reduced. That hot line runs right above the CVT cover. It's good that it's above and not below it so heat transfer is minimized but it can still be improved by the insulation.

Image


Coronovirus gave me the time to add Thermotec to the front driver and passenger side foot wells

Driver side was pretty easy to remove

Image


Passenger side was a PITA. You have to completely remove the upper dash screws and slide the upper dash back in order to get it out

Image


I set one of them by my wood stove to help bond the Thermotec to the plastic and check out the temperature difference


You can see the Thermotec/pool noodle combo is going to keep my leg nice and cool during the summer as well as my front beverages. Since I have the passenger foot well out I can now also insulate the metal coolant return line running along the passenger side

Image


Once again, that return line is right next to the engine air intake duct, heating it up. The only reason why I can guess why it's run so close is to help evaporate any oil/fluid that accumulates there over time. I have my oil catch can installed so I'm not worried about oil accumulation there anymore.

Image


Driver side foot well cracks. Mine finally started to crack. Time to repair and improve the stability. For those of you out of warranty and want to pre-fix it, do it before it starts cracking.

Image


As seen from below

Image


First step is to take your $9 Harbor Freight heat gun on high and melt the plastic below and melt it back together. You have to first adjust the cracked sides so that they're back together. You may need a third set of hands. You have to be careful with the heat so that you don't warp the plastic. If you need to, practice on some scrap plastic.

Image


I took some scrap pieces of plastic that I had when I butchered my rear driver side passenger foot well and put it in place

Image


Melted it good and bonded. That area is probably twice as thick as before

Image


This is why you want to do it before it cracks. I was able to re bond the top side of the cracks, but it's not the prettiest, but it's better than the previous open cracks. If you get some warping you can heat the whole area up and use a large flat piece of wood to straighten the area out.

Image


UPDATE:

Decided to add some Thermotec under the rear bed to help quiet things down and reduce heat soak for the rear passengers.

Bed removed

Image


Underside

Image


Installed

Image


It does make a little bit of difference as far as noise but I don't think it can be captured via video (I'm not relocating my dash cam).
 
#18 ·
The Wolverine X2/X4 is one of the coolest running SxS as far as cabin heat. If you think your unit runs cool now, do these mods and you'll be amazed at the difference as you can improve on the existing design. No more uncomfortable heat by your right leg and sound is greatly reduced as well.

I had initially installed Thermotec in the center console, engine cover, and rear foot wells with good results. I also insulated my driver side coolant line the entire length of the cab. This is a MUST DO mod for every X2/X4 owner as the hot coolant line runs right along your right foot/leg. I didn't do the front foot wells initially because they're someone a PITA to remove. Pics from my initial mod:

Image


Got around to insulating my console today. I will do more later.

 
#13 ·
Reserved 3
 
#14 ·
Thats a lot of miles. I used my Grizzly this weekend
 

Attachments

#15 · (Edited)
#16 ·
#17 ·
Updated post #13 with adding Thermotec to the bottom of the rear bed.
 
#19 · (Edited)
For 9500 miles I bring you views of my intake valves. I already have some naysayers who are saying 'so what?' claiming that they're getting cleaned by fuel from the injectors. Point taken but what about the area between the throttle bodies and injectors that don't get fuel spray and are subject to PCV combustion gases? Valve seals? Cylinder walls?

Me Siamese if you please!

Intake 1

Image


Image


Intake 2

Image


Image


Intake valve 1

Image


Image


Intake valve 2

Image


Image


Intake valve 3

Image


Well hi there you sexy clean cylinder!

Image


Image


Intake valve 4

Image


You can see the spark plug in this shot to the left

Image


Could you ask for a cleaner-looking valve and seats or signs that my valve stem seals are tiiggght at 9500 miles?

Synthetic oil is snaaaakkee oooilll, it's a waaaaaaaaaste of money!!!!! My engine pics say otherwise.
 
#21 ·
Just to feed the trolls some more, here are shots of my transmission, rear, and front diffs, all running Mobil 1 75W90 and Gear Butter by Hunterworks

I'm proud to say I'm no expert on gear wear patterns so maybe experts can chime in on how they look

Gear right near the transmission fill tube

Image


Rear diff........sorry but that hole is small so it's hard to get a decent picture

Image


Front diff

Image
 
#22 ·
Good new is undoubtly GREAT!!!


That what we all hope is happening.
 
#23 ·
All the more reason to run 100% synthetic. Mobil1, Amsoil, etc.. Your good for another 9500. Might as well just keep it now. Resale won't be that great now anyway.
 
#24 ·
I run synthetic but have the poor part cylinder issue causing oil consumption. I am waiting for the dealer to open up to address this. Email from me about it sounded encouraging that they'd order the kit.
 
#27 ·
I’m thinking of putting thermotech under the bed to help reduce the heat transfer from the muffler. Hopefully it adheres and stays put. Also planning to do the center console.
 
#30 ·
Not really, more heat reduction as far as the footwells. Keep in mind I have the HMF exhaust. With stock exhaust I may notice it more soundwise.